Configure the policy matrix
The policy matrix is your primary control surface. This guide shows how to set it. For the concept behind it, see the policy matrix.
Before you begin
- You need an administrator role with permission to manage governance policy.
- It helps to have connected at least one destination so you can see routing take effect.
Open the matrix
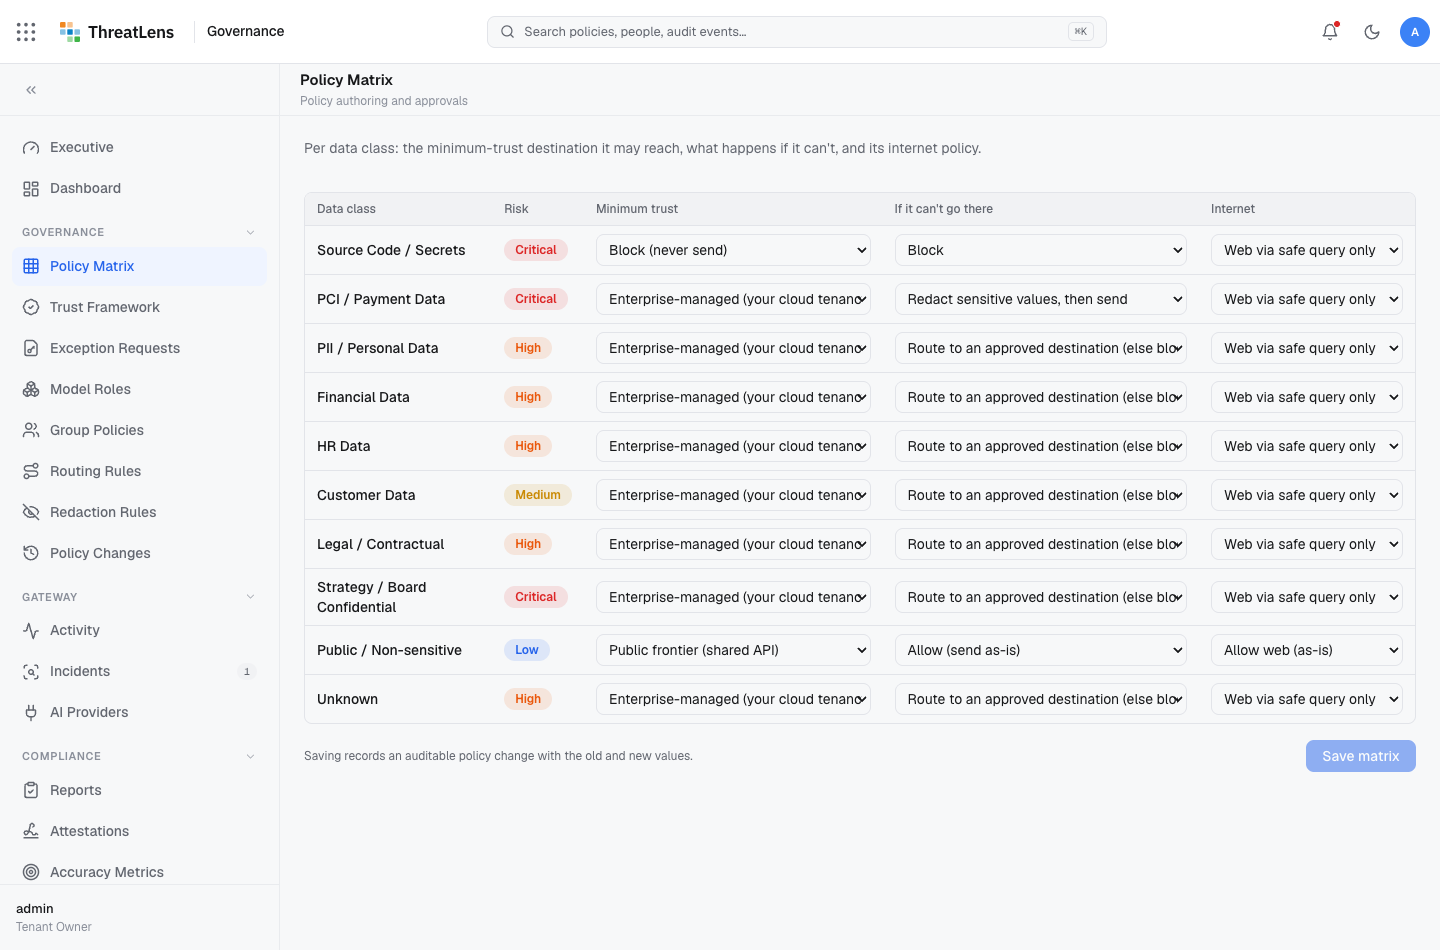
Go to Governance → Policy matrix. You'll see one row per data class, with three columns: Minimum trust, If it can't go there, and Internet.
Set a row
For each data class:
- Minimum trust — choose the lowest trust tier a destination may be for this kind of data (for example, Enterprise-managed).
- If it can't go there — choose the fallback action when a destination is below that minimum:
- Allow — send as-is (used when the minimum is public-frontier).
- Redact — strip the sensitive values, then send.
- Route — send only to an approved destination; otherwise block.
- Block — never send.
- Require approval — hold for an administrator's decision.
- Internet — set the web-access policy for this class.
Save
Click Save matrix. The change takes effect immediately for new requests.
What gets recorded
Saving writes a policy-change entry to the audit log with the old and new values — so the matrix itself is governed.
Always-on protections
Regardless of the matrix, raw secrets and prompt injection are blocked at every tier. You can tighten any class, but you cannot make these reach a model.
A worked example
To keep payment data off shared models entirely: set PCI / Payment data → minimum trust Enterprise-managed, action Route. Now PCI is redacted-and-grounded on your enterprise model and withheld from any public-frontier model.